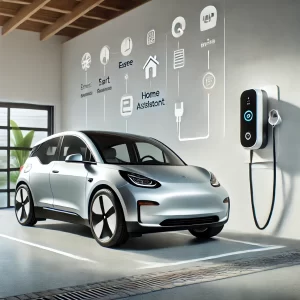
Smart charging for electric vehicles (EVs) is not just about convenience; it’s also about optimizing costs and efficiency. In this guide, we’ll explore how you can automate smart charging in Home Assistant, ensuring that charging doesn’t start immediately when you plug in the charger but follows your pre-defined schedules or conditions.
Step 1: Set the Easee Charger to Private Mode
To prevent the EV from starting to charge as soon as it’s plugged in, you need to set the access level of your Easee charger to “Private.” This configuration can be done via the Easee app:
- Open the Easee app on your smartphone.
- Navigate to your charger settings.
- Set the access level to “Private.”
This step ensures that the charger won’t start charging until explicitly commanded by Home Assistant.
Step 2: Configure the Automation in Home Assistant
Once the charger is set to “Private,” you can create an automation in Home Assistant to control when charging begins. Below is an example automation that integrates with the Easee charger:
alias: Volvo EV Smart Charger - Start Charging
description: "Automation to start EV charging only when conditions are met."
triggers:
  - platform: state
    entity_id: sensor.ev_smart_charging_charging
    from: "off"
    to: "on"
conditions: []
actions:
  - device_id: 95c2b85843137146405bf9f44324b5c8
    domain: easee
    type: start
  - delay:
      hours: 0
      minutes: 0
      seconds: 10
  - service: easee.action_command
    data:
      device_id: 95c2b85843137146405bf9f44324b5c8
      action_command: resume
mode: single
Breaking Down the Automation
- Trigger: The automation triggers when the
sensor.ev_smart_charging_chargingchanges from “off” to “on.” - Actions:
- The Easee charger is commanded to start charging using its
startaction. This action also authorizes the Easee charger to begin charging through the Easee app, which is set to “Private.” - A 10-second delay is introduced to ensure proper synchronization.
- The
resumeaction command is sent to the Easee charger to finalize the charging process.
- The Easee charger is commanded to start charging using its
Why This Approach?
- Control and Flexibility: By setting the charger to “Private,” you’re in complete control of when charging starts. This is particularly useful when using dynamic electricity pricing or renewable energy sources.
- Seamless Integration: Home Assistant allows you to integrate various sensors and conditions, such as charging only during off-peak hours or when renewable energy production is high.
- Ease of Use: The Easee integration in Home Assistant makes it simple to send commands to your charger, enabling advanced automations with minimal effort.
Tips for Optimization
- Combine with Nordpool Integration: Use Nordpool to fetch real-time electricity prices and set conditions to charge only during the cheapest hours.
- Check EV Status: Integrate your car’s state of charge (SoC) sensor to ensure charging is only initiated when necessary.
- Location-Based Triggers: Use presence detection to confirm your car is at home before triggering the charger.
Conclusion
By setting your Easee charger to “Private” and leveraging Home Assistant’s powerful automation capabilities, you can ensure that your EV charging is both smart and efficient. Whether you’re optimizing for cost, convenience, or environmental impact, this setup provides the flexibility and control you need.
Start automating your EV charging today and take full advantage of the smart home ecosystem!